Starting Construction
Now would be a good time to invest in a sewing machine. A BIG sewing machine......Although, even that may not be enough.
Sewing By Hand
Not a bad deal, just takes longer. I hate that. There are basically two ways to stitch by hand: a two needle saddle stitch, and by using a stitching awl.Me? I'm a fan of the stitching awl...it's faster (huh - go figure). My friend Fox swears by saddle stitching, and to be honest I have to agree with him that it is a superior stitch, and here's why:
With a stitching awl, you have two lines of stitching that meet in the middle, exactly like the lock stitch made by a sewing machine. Problem is, if one of the threads breaks, the seam opens at that spot. With a two needle saddle stitch, you have two lines of stitching that pass one another: essentially two running stitches, one running in/out, the other out/in. If one breaks, you still have the other holding things together.
Sewing By Machine
Let's pretend for a moment that you're going to buy a sewing machine to do this (because of the volume of work I had, I did). When you go shopping, take two samples with you: a piece of the 9-10 oz tooling leather with a piece of the 5-6 oz glued to it, and a four layer piece of the 5-6 oz. Whatever machine you look at should do two things: the machine should feed the material without coaxing, and it should skip no stitches at all.By the way, don't even think about walking into your local Bernina Sewing Center or fabric store with your samples. Even the best domestic machines aren't prepared for what you'll be doing. 'Heavy Duty' means at most six to eight layers of denim, hammered flat before stitching. A quarter to half inch of leather? --snort-- I don't think so.
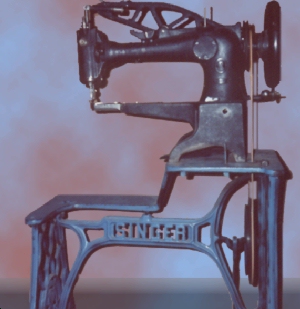
What you'll want is an industrial machine, preferably one with a walking foot. I have a Singer industrial made in 1924 (the machine pictured at the top of this page is my shoe-patch machine). It once sewed through an aluminum ruler without skipping a stitch, but it can't handle the leather. Sews through it alright, but the needle binds in the material and lifts the presser foot along with the needle bar. Skips stitches badly.
Ultimately, I found a Singer 111W walking-foot machine, used for $800.00 - what a difference! It's noisy as Hell's dishwasher, but it'll handle up to 1/2". Sweet.
Even that's not enough when I'm working with bullhide. Oh, sure, I can sew the flat pieces together, but even skived, stitching the upper to the midsole is too much. I take my pieces to a local shoe repair shop and they stitch it for me for about $10. Believe me, it's worth it.
Check your phone book for a local dealer of industrial machines, or contact an alterations shop and ask where theirs came from. Then call the company and tell them what you want, and what materials you're using.
