
Attaching The Back To The Front
Or: Now would be a good time to get good at gluing...
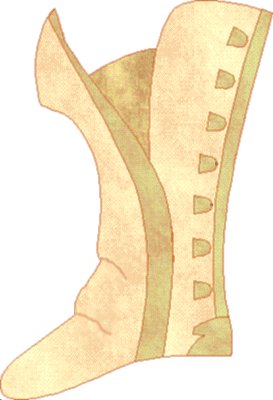
| But first...we need to do one bit of work to the front. Remember cutting out a block to attach the buttons to? This is the part where you attach that. Cement it down and then stitch, but let me give you a word of warning: if you're doing this by machine, it's very easy to slide off the edge, and this is a place where something like that will really show. Here's a suggestion: make the block about 1/4" larger than it needs to be, don't apply cement along that extra 1/4". Stitch it down then trim off the leather close to the stitching. |

|

|
This one screws me up every time I make a pair of boots...the math works, but for some reason it just seems wrong in my head. Remember when we added 1/4" to the front and to the back for the side seam? The front will now overlap the back 1/2" and be cemented and stitched down. Trust me: it looks like a helluva lot, but it's correct. |
In which case, they'll probably enjoy it anyway.
|
The final step you'll do with what is fast becoming the 'upper', take the underlap and...
um...lap it under the overlap 1" (refer back to
pattern adjustments
if you need a reminder) and cement it in place along the seam allowance at the bottom - where
the upper will join the midsole. I also like to stitch them, especially if I've left
more than 1/4" I can baste without worry about the basting showing after the upper
and midsole are together.
The stitching is good for another reason: because you're only cementing down at the bottom, there isn't enough surface area for the cement to hold - stitching will let you muck about with the uppers without having to be so careful about them coming apart. |
|
