|
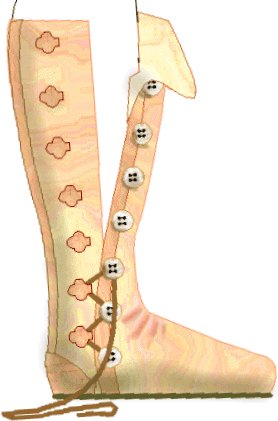
Pattern Adjustments...Among other thingsWARNING: Don't start cutting leather until you have read this section and the next through at least once. You can re-do markings, but you can't 'un-cut' something. We need to modify the patterns a bit more, adding seam allowances and adjusting for fit, then make patterns for the heel block, foxing, lace foxing, lacing blocks, and sole. Stay with me, because this can get a little confusing - especially keeping track of what's inside the leg, what's outside. The front is especially troublesome because it appears symmetrical. Make good notes! |
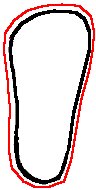
The front
|
|
| Now, we need some other pattern pieces. The first is the heel block. It adds stiffness to the heel of the boot, keeping it from curling under the subject's heel. It also provides the first lacing block. If it looks a little odd, bear in mind that the part that sticks out will be folded under to form a loop through which the lace will be passed. Also, add 1/4" to 1/2" to the sole edge. Click here for a pattern (PDF format.) |
|
|
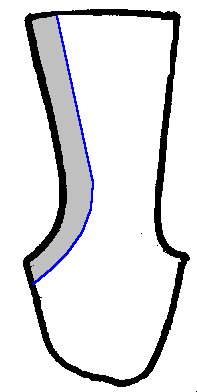
New info! The last major piece you're going to need is the Button Block, which is used to provide a more secure place upon which you will attach the buttons. It's merely a straight piece of leather, 1" to 1-1/4" wide and the length of the button edge of the front, as shown in gray. Make sure there's the extra 1/4" to 1/2" on the sole edge, and make it maybe 3" longer than it needs to be. You can always trim it off later. |
|
The sole is probably the easiest piece to do. add 1/4" to 1/2" all the way around. However, make sure you keep the original piece: you're going to need both, one with the extra and one without. |
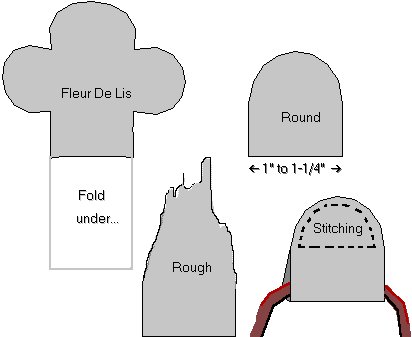
| The lacing blocks you can cut out of scrap pieces after all the big pieces (front, back, button block) are cut out. Ideally, you should cut them from thicker parts of the hide. The one I use most often is the round style. Never use square corners unless you have a strong reason to do so: the curners curl up and look odd. |
(click on the image to view it full size) |
I've done the Fleur de Lis once. Once. Never again. You have to stitch each of the roundels down, and even by machine (or maybe especially by machine) it sucked. The rough style is an idea I got from a friend of mine named Fox. The rough edge is left on top and you stitch it down as if it were round, letting the rough edge do as it will. Don't forget: even though I only have it illustrated on the Fleur de Lis, you must add the extra piece that will fold under and provide the loop to lace through (like the example on the bottom right).
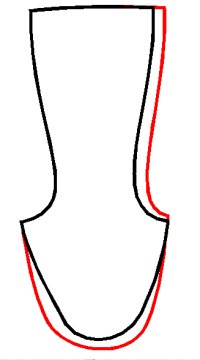
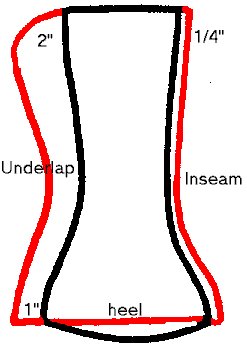
1 When you see the references 'add 1/4" to 1/2"', it pretty much up to you which one you do. 1/2" is easier to work with, but it leaves more seam allowance inside the boot. 1/4" will feel better on the feet, but it's easy then to get too close the edge when you're sewing and run off. Up to you, just make sure that you do the same on every edge that comes in contact wtih the sole, and the sole itself.
