...and isn't
for Others
Get a sharp pencil...
Plus a yardstick, protractor, and a big piece of paper.I draft from left-to-right, same as I read, so that's how I'll illustrate it here. (none of this is to scale because a five foot long cloak is a big piece of fabric. The angles will be right though.)
Start by drawing a baseline on the long edge of the paper closest to you. We divide it up this way:
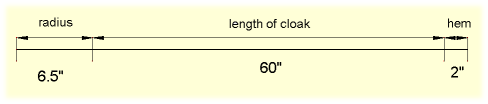
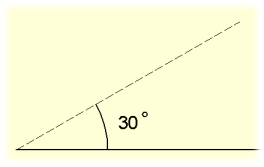
Now, from the leftmost point, draw a line to the right 30° from the baseline. Make a point 6-1/2" out, and connect that point to the 6-1/2" radial point on the baseline with an arc: that's the neckline.
Finally, extend that line out to the length of the cloak plus the hem (a) - in our example that's 62" - and connect that line to the baseline with an arc (b).
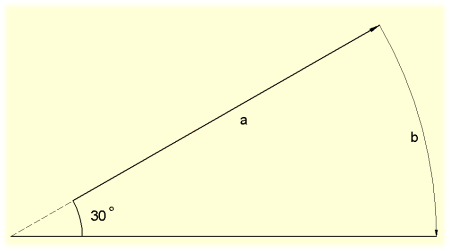
Believe it or not, that's it! That's our pattern piece. Cut six: four will be on the grain as in piece a; two, the center front pieces (left and right) will be as in piece b.

Remember, this is the basic pattern with only the hem added. You still need to modify it some for front facings, openings in the front-side seams for your hands to have access and whatever other details you want to add. Also, the length from your neck to the floor in back is going to be a little longer than the same measurement down the front, so to get the hem even you'll need to adjust there as well. One really easy way to get the same length all around is to make the cloak too long by six inches or so, then put it on unhemmed and have someone pin the hem measuring up from the floor. If you want it to be floor length, stand on a milk crate; pinning will be easier.
« Back to Circle Drafting, page 2.
